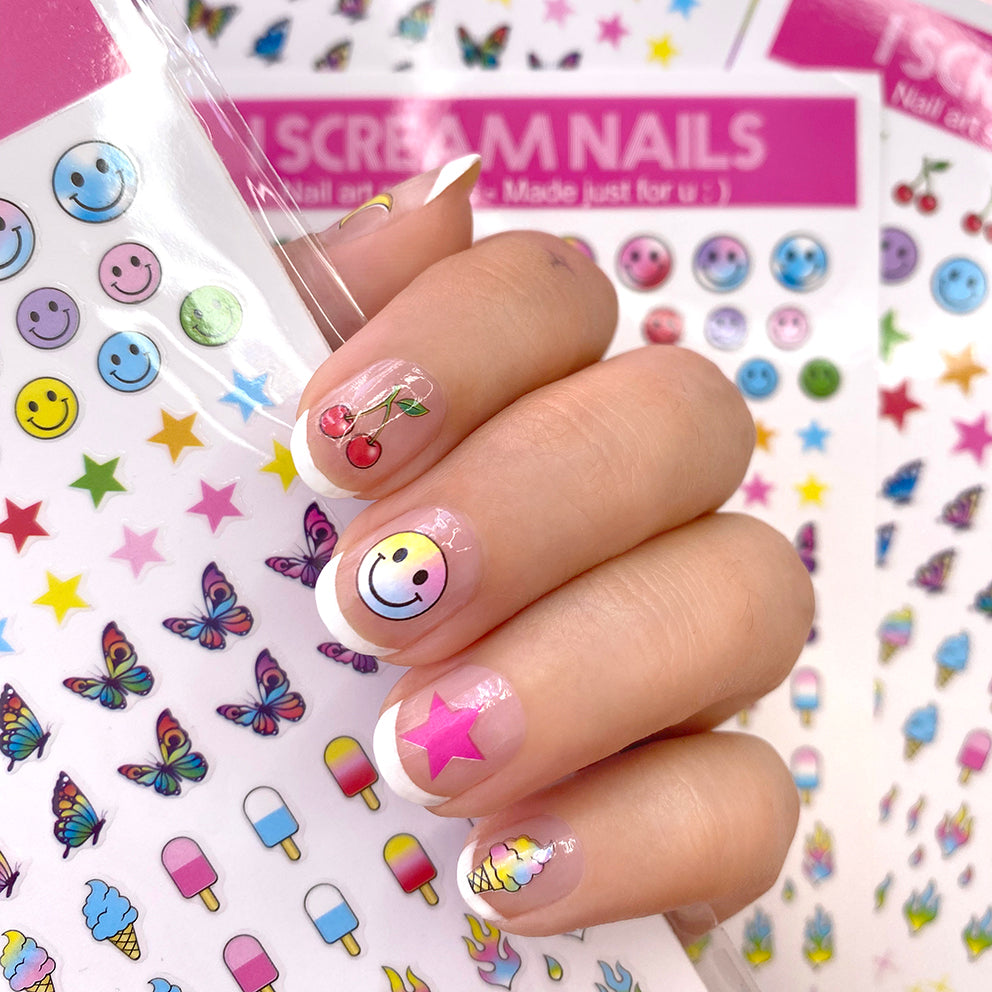
What Are Nail Stickers?
Nail stickers are decorative adhesives designed to enhance your nails. They offer an easy way to create stylish nail art without advanced skills. Nail stickers come in various shapes, sizes, and designs to match personal preferences. These stickers are perfect for beginners or anyone looking for quick nail art solutions.
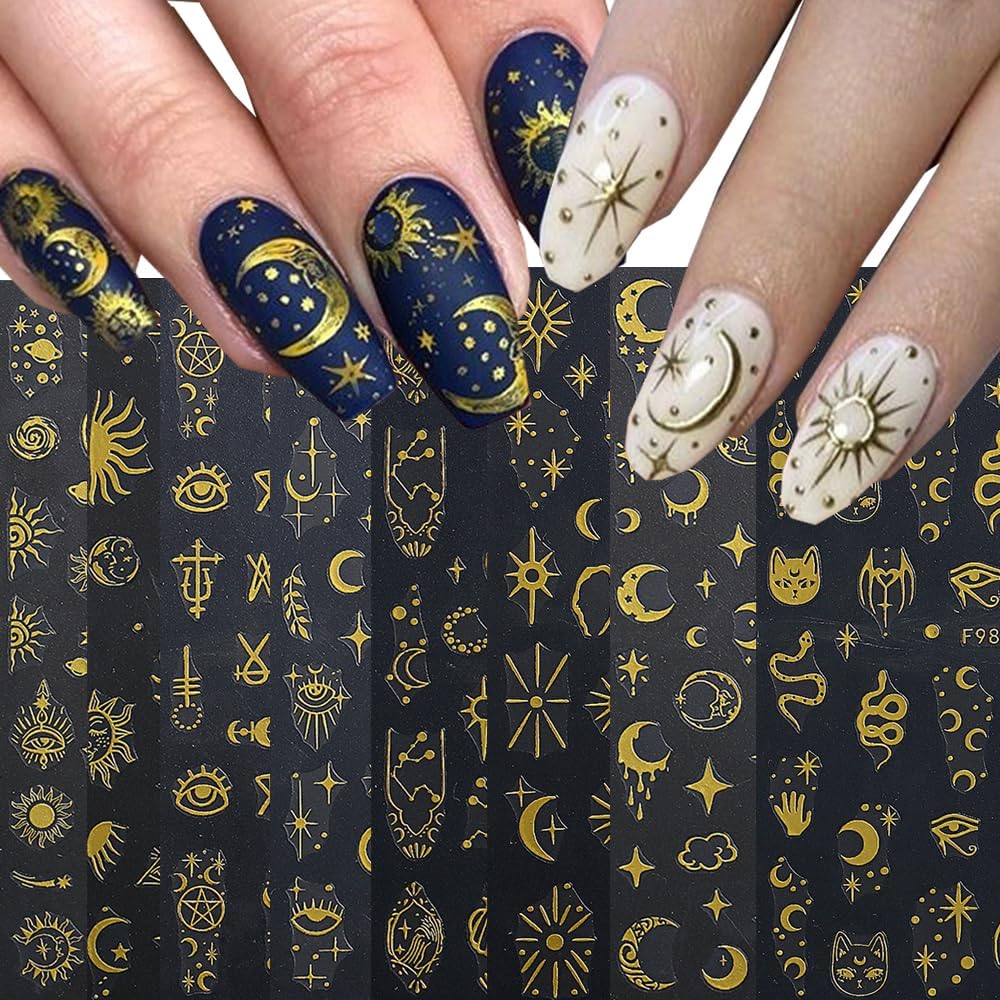
Types of Nail Stickers
There are several types of nail stickers available, including:
- Peel-and-Stick Decals: These are straightforward to apply. Just peel and place them on your nails.
- Water Transfer Stickers: These require soaking in water. Slide them off the backing and apply them to your nails.
- Full Nail Wraps: These cover the entire nail, providing an instant polished look without nail polish.
- 3D Nail Stickers: These offer raised designs, adding texture and a unique dimension to your nails.
Benefits of Using Nail Stickers
Nail stickers have multiple benefits, making them a popular choice for nail art lovers:
- Ease of Use: Nail stickers are beginner-friendly and require minimal tools.
- Speed: Applying nail stickers is quick, saving time compared to traditional nail art techniques.
- Versatility: With countless designs available, nail stickers suit any occasion or outfit.
- Cost-Effective: Nail stickers are affordable, providing a budget-friendly way to style your nails.
- Damage-Free Removal: Most nail stickers peel off easily without damaging the natural nail surface.
By exploring the types and benefits of nail stickers, you can discover creative ways to style your nails effortlessly.

How to Choose the Right Nail Sticker
Choosing nail stickers can be tricky with so many options available. Knowing what to look for helps you pick stickers that suit your personal style and needs.
Factors to Consider When Selecting Stickers
- Nail Size and Shape: Select stickers that match your nail dimensions for a perfect fit.
- Design Preferences: Decide if you prefer bold, minimal, or seasonal sticker styles.
- Material Quality: High-quality stickers last longer and resist peeling easily.
- Ease of Application: Beginners may prefer peel-and-stick or full-wrap options for convenience.
- Occasion: Choose designs that fit casual looks, formal events, or holiday themes.
- Price and Quantity: Check the affordability and the number of stickers in a pack.
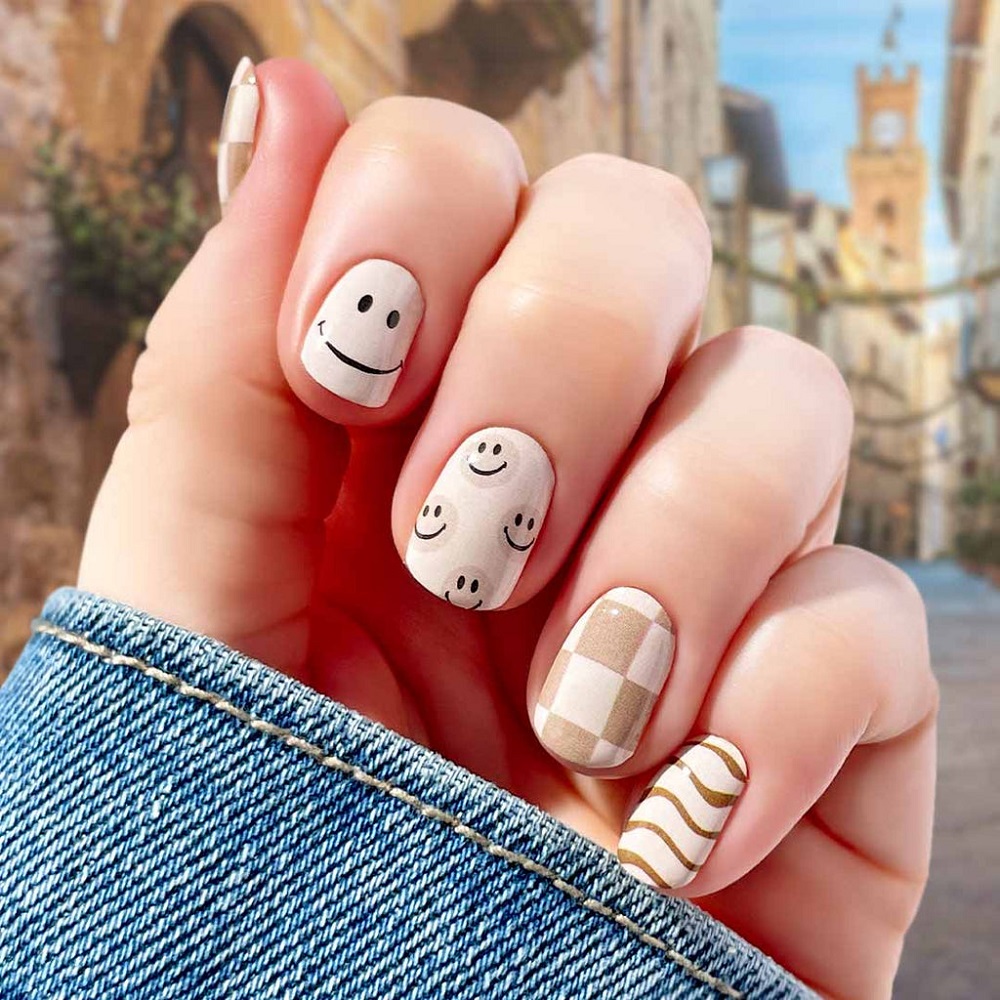
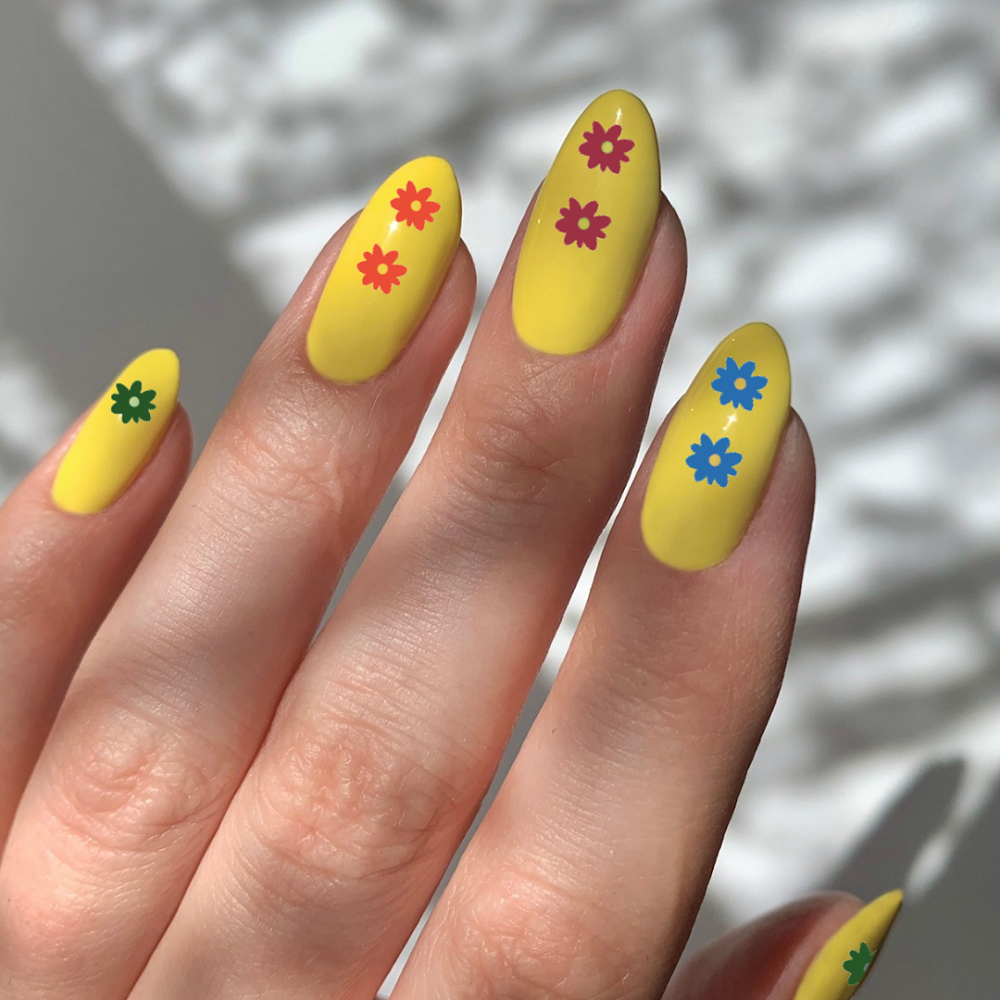
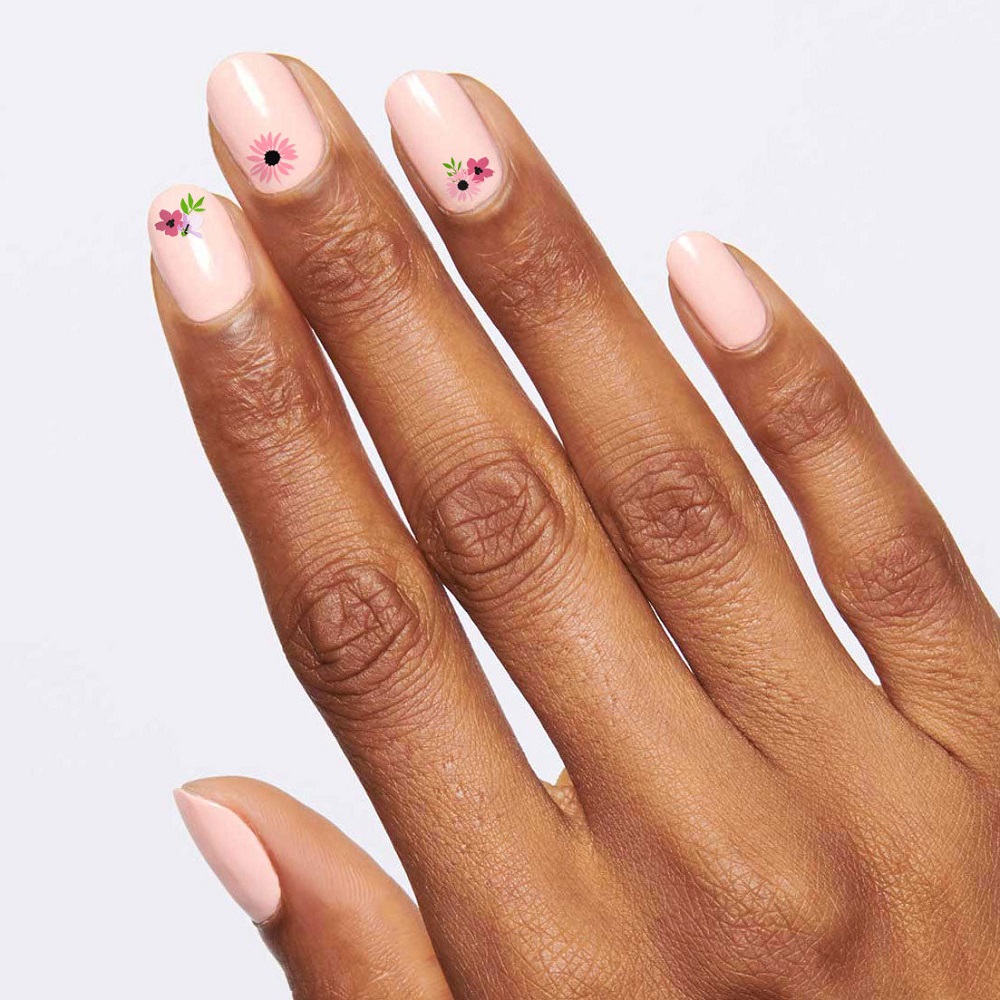
Popular Designs and Styles
- Floral Patterns: Elegant and perfect for spring or summer looks.
- Geometric Shapes: Modern and chic designs for everyday wear.
- Seasonal Themes: Holiday-themed stickers like pumpkins or snowflakes for festive nails.
- Cartoon Characters: Fun and playful designs great for kids or casual outings.
- Metallic Finishes: Glamorous gold or silver stickers for party-ready nails.
Consider these tips to choose stickers that enhance your nail art experience.
Preparing Your Nails for Sticker Application
Proper preparation is key to getting a smooth and lasting result with nail stickers. Without it, stickers may not adhere well or may peel sooner.
Essential Tools for Application
To apply nail stickers effectively, gather the following tools:
- Nail File: Shapes your nails and smooths sharp edges for an even look.
- Cuticle Pusher: Gently pushes back cuticles to create a clean workspace.
- Nail Buffer: Removes surfaces oils and shines nails for better sticker adhesion.
- Cotton Pads: Helps clean nails thoroughly before applying stickers.
- Rubbing Alcohol or Nail Cleanser: Cleans the nail surface to remove dirt or oils.
- Tweezers: Precise tool for placing stickers accurately on your nails.
- Topcoat or Clear Nail Polish: Seals stickers and adds a professional finish.
Having these tools ready ensures an efficient and smooth application process.
Preparing the Nail Surface
Follow these steps to properly prep your nails:
- Clean Nails Thoroughly: Wash hands to remove dirt, oils, and residue. Use rubbing alcohol for deeper cleaning.
- Trim and Shape Nails: Cut and file nails for a neat base. Ensure they are smooth and even.
- Push Back Cuticles: Use a cuticle pusher to maximize nail surface. Avoid over-pushing to prevent injury.
- Buff the Nail Surface: Buff gently to create a smooth, sticker-friendly texture.
- Let Your Nails Dry: Fully dry nails to avoid moisture interfering with sticker adhesion.
Preparing your nails properly ensures your nail stickers stay applied longer and look their best.
Step-by-Step Guide to Applying Nail Stickers
Applying Stickers to Natural Nails
Follow these steps to ensure proper application of nail stickers on natural nails:
- Clean Nails: Wash hands and clean nails with rubbing alcohol to remove oils or dirt.
- Prepare Nails: File and shape nails, then gently buff them for a smooth surface.
- Choose a Sticker: Pick a sticker design that matches the size of your nail.
- Peel the Sticker: Use tweezers to carefully peel the sticker from its backing.
- Place the Sticker: Align the sticker on your nail and gently press it down.
- Smooth Out Air Bubbles: Use your fingers or a cuticle pusher to press out wrinkles or bubbles.
- Trim Excess: Use scissors or a nail file to trim stickers that extend past your nail edge.
- Seal with Topcoat: Apply a clear topcoat to secure the sticker and add shine. Let it dry fully.
These steps ensure flawless sticker application that lasts longer.
Tips for Best Sticker Placement
To get trendy nail art with stickers, remember these placement tips:
- Start with the Dominant Hand: Apply stickers on your dominant hand first for better precision.
- Work Under Good Light: Ensure proper lighting to clearly see sticker positioning.
- Place from Cuticle to Tip: Position stickers starting at the cuticle and smooth towards the tip.
- Avoid Overlapping: Use appropriately sized stickers to prevent overlaps or bulkiness.
- Double-Check Placement: Confirm alignment before fully pressing the sticker onto the nail.
- Practice Patience: Take your time to place each sticker carefully for a polished look.
Using these tips and steps will guarantee stunning nails with beautifully applied stickers.
Creative Nail Art Ideas Using Stickers
Nail stickers are not just simple decorations; they open up creative nail art possibilities. Mixing and combining various patterns and designs allows you to personalize your nails uniquely. Let’s explore two exciting ways to use nail stickers creatively.
Mix and Match Patterns
Mixing and matching patterns can give your nails a fun and stylish look. Here’s how you can do it:
- Combine Contrasting Designs: Pair floral patterns with geometric shapes for a bold, eclectic look.
- Use Color Harmony: Select sticker colors that complement each other to create a cohesive design.
- Alternate Patterns: Apply different designs on each nail for a trendy mismatched effect.
- Layer Stickers: Layer small stickers over larger ones for a multidimensional appearance.
- Highlight an Accent Nail: Match plain nails with a single, bold patterned nail for added focus.
This technique is perfect for expressing creativity and experimenting with unique combinations.
Combining Stickers with Nail Polish Designs
Enhancing your nail polish with stickers adds texture and depth. Follow these styling tips:
- Apply Stickers Over Colored Polish: Use pastel or vibrant nail polish as a base for sticker designs.
- Create Borders: Place stickers along the edges or at the tips for a clean look.
- Add Glitter Polish: Use glitter polish to frame the sticker or add sparkle around it.
- Stencil with Stickers: Use stickers as stencils, paint over them, and peel them off for unique patterns.
- Customize with Rhinestones: Pair stickers with small rhinestones for extra glamour.
With these methods, you can elevate your nail art and make it truly one of a kind. Experiment with these ideas to create beautiful, sticker-assisted nail art.
Maintaining Your Nail Sticker Art
Caring for your nail sticker art is essential to keep it looking fresh and stylish. Proper maintenance ensures long-lasting designs and minimizes wear.
Tips to Prolong Sticker Longevity
Follow these tips to make your nail stickers last longer:
- Apply a Topcoat Regularly: Seal stickers with a clear topcoat every few days to prevent lifting.
- Avoid Excessive Water Exposure: Prolonged soaking can weaken adhesive. Use gloves when washing dishes or cleaning.
- Be Gentle with Your Hands: Avoid activities that might scratch or peel stickers, like opening cans.
- Reapply Edges if Needed: If edges lift, press them back down with a clear polish or glue.
- Moisturize Carefully: Use nail oil or lotion around the nails without touching the stickers.
- Avoid Harsh Chemicals: Minimize contact with cleaning agents to prevent damage to the stickers.
By following these practices, your nail art will stay beautiful and intact for longer periods.
Removing Stickers Safely
Proper removal is crucial to avoid damaging your natural nails. Here’s how to do it:
- Soak in Warm Water: Dip nails in warm, soapy water for 5-10 minutes to loosen the adhesive.
- Lift Stickers Gently: Use an orange stick or tweezers to peel from the edges slowly.
- Avoid Harsh Scraping: Never forcefully scrape stickers to prevent nail surface damage.
- Use Nail Polish Remover: For stubborn stickers, use remover with a cotton pad to break down adhesive.
- Clean and Moisturize: Wash hands after removal and apply nail oil to restore hydration.
Removing stickers with care maintains your nails’ health and prepares them for your next art project.
Where to Buy Stylish Nail Sticker
Finding the right places to buy nail stickers ensures you get trendy and quality designs. Both online stores and local retailers offer great options to match your nail art needs.
Online Stores Offering Trendy Designs
Shopping online provides access to a wide variety of nail sticker styles and designs. Here are popular online platforms to explore:
- Amazon: Offers countless sticker collections, including peel-and-stick decals and 3D designs. Affordable and convenient.
- Etsy: Features unique, handcrafted stickers created by independent sellers. Perfect for original and artistic looks.
- eBay: Provides budget-friendly options and international designs. Great for a cost-effective choice.
- Shein: Known for its trendy and seasonal stickers at competitive prices.
- Dedicated Nail Art Websites: Sites like Born Pretty or Maniology specialize in nail art accessories, including stickers.
- Social Media Shops: Browse Instagram or Facebook shops for emerging sticker brands and collections.
Buying online is ideal for variety, with designs ranging from floral to geometric themes.
Local Retailers for Nail Art Supplies
Buying from local retailers allows you to see items in person and ensure quality. These options are handy for immediate shopping:
- Beauty Supply Stores: Shops like Sally Beauty offer a range of nail art products, including stickers.
- Drugstores: Stores like Walgreens and CVS stock affordable sticker packs alongside other nail supplies.
- Supermarkets: Larger chains may carry trendy nail stickers in their beauty aisles.
- Specialized Nail Salons: Some salons sell exclusive sticker designs to their clients.
- Craft Stores: Stores like Michaels sometimes carry decorative stickers. Ideal for DIY nail art enthusiasts.
Local retailers provide quick access, especially for last-minute nail art needs. Combine these options to find nail stickers that elevate your style effortlessly.
Caring for Your DIY Nail Art
Maintaining Your Nail Designs
After creating stunning nail art using stickers, it’s essential to maintain them to ensure longevity. Regular maintenance can prevent chipping and fading, allowing you to enjoy your DIY manicure for weeks. Start by applying a high-quality topcoat every few days to seal your stickers and provide a protective barrier against wear.
Avoid activities that can expose your nails to excessive moisture or chemicals. Wearing gloves while washing dishes or cleaning is a good practice. A gentle approach to handwashing can also help maintain nail integrity. Being mindful of how you treat your nails will enhance the lifespan of your manicure.
Knowing When to Refresh
Even with the best care, it may be necessary to refresh your nail art occasionally. As nails grow, the design on the tips may start to show wear and tear, indicating it’s time to reapply. When ready to change your nail art, start by gently removing stickers with an acetone-based remover or nail polish remover, making sure to protect the surrounding skin.
Refreshing your nails not only helps them look great but also allows for ongoing creativity. Nail art is a way to express yourself, so feel free to experiment with new designs and styles every few weeks.
Unleash Your Creativity with Nail Sticker
In conclusion, nail stickers are a fantastic tool for anyone looking to elevate their DIY nail art game. With various types, styles, and designs available, they allow for endless creativity and personalization. By combining nail sticker with different nail polish techniques, accent designs, themed ideas, and 3D elements, you can create stunning manicures that reflect your individual style.
These versatile accessories not only provide a fun way to enhance your nails but also encourage experimentation and self-expression. Whether you’re preparing for a special occasion or simply indulging in a little pampering at home, nail stickers can transform your nails into mini canvases of art.
So, gather your favorite colors, stickers, and tools, and start creating your unique nail designs. Celebrate each season, occasion, or simply your mood—all while enjoying the process of crafting beautiful and expressive nails! With a little creativity and the right materials, your DIY nail art journey will be fulfilling and enjoyable.