Trending Halloween Nail Designs for 2023
Halloween is the perfect time to showcase creative nail art. This year, trending Halloween nail designs bring together classic motifs and innovative patterns. From spooky shades to bold designs, there is something for everyone.
Popular Colors and Patterns
This year’s Halloween nail colors are both traditional and edgy. Popular choices include:
- Classic Halloween Hues: Orange, black, and white remain timeless favorites for nail art.
- Metallic Shades: Gold, silver, and bronze add a modern twist to spooky designs.
- Gradient Shades: Ombre nails using dark-to-light color transitions are trending.
Patterns are also key for Halloween nail designs. Some hot trends include:
- Spider Web Patterns: Perfect for spooky themes, especially in black or silver.
- Blood Drips: Red drips against neutral or dark bases provide a chilling effect.
- Stars and Moons: Celestial patterns add a magical touch to Halloween nails.
Mixing bold colors with intricate patterns can make your nails stand out this season.
Classic Themes vs Modern Twists
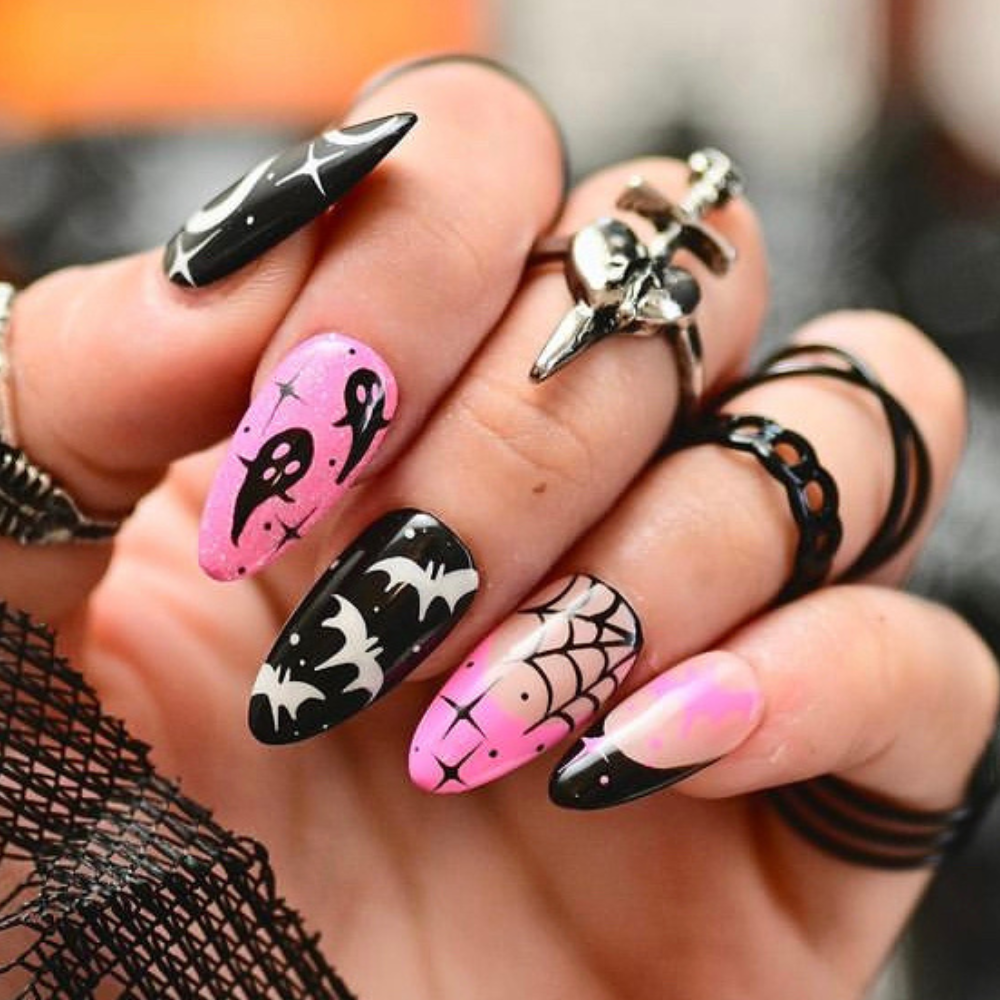
Classic Halloween themes like pumpkins, ghosts, and bats always remain in style. They cater to traditional aesthetics and feature simple, recognizable designs.
Modern twists, however, give these themes a fresh look. Here’s how modern designs update classics:
- Holographic Ghosts: Adding sparkle to ghost images gives them a fun vibe.
- Geometric Pumpkins: Abstract, minimal pumpkin designs modernize the traditional look.
- 3D Nail Art: Raised textures like skeletons or bats are popular among enthusiasts.
Whether you stick to classic designs or opt for new trends, your Halloween nails will surely grab attention.
Easy DIY Halloween Nail Ideas
Creating Halloween nail designs at home can be both fun and budget-friendly. With the right tools, materials, and guidance, anyone can achieve amazing results. Let’s explore how to get started and create stunning nails this Halloween.
Tools and Materials You Need
Before diving into nail art, gather these essential tools and materials:
- Nail Polishes: Pick Halloween-themed colors like orange, black, white, red, and metallics.
- Top Coat and Base Coat: Ensure your designs last longer with these essentials.
- Nail Art Brushes: Use fine-tipped brushes for precise designs.
- Dotting Tools: Perfect for creating dots, eyes, or other circular patterns.
- Nail Stickers and Decals: Easy-to-use options for intricate Halloween designs.
- Striping Tape: Helps in creating sharp lines and geometrical designs.
- Glitter and Rhinestones: Add sparkle and texture to your Halloween nails.
- Sponges: Great for ombre effects or gradient nails.
- Nail Polish Remover Q-tips: Clean up any mistakes easily.
Having these tools will make your DIY process smooth and enjoyable.
Step-by-Step Guide for Beginners
Here’s a simple guide to create Halloween nail designs at home:
- Prep Your Nails: Start by cleaning, filing, and shaping your nails. Push back cuticles for a neat look.
- Apply Base Coat: Protect your nails and ensure the polish adheres better.
- Paint Your Base Color: Use solid colors like orange, black, or nude as a base for your design.
- Add Your Design: Use brushes or tools to create patterns like spider webs, pumpkins, or blood drips. Stickers and decals can simplify this step.
- Add Details: Use dotting tools or fine brushes for small details like eyes, stars, or tiny bats.
- Seal the Design: Apply a top coat to make your design shiny and long-lasting.
- Clean Up Edges: Use a polish remover and Q-tip to tidy up any mistakes.
These steps are ideal for beginners. Start simple and experiment as you grow confident!
By following these tips, creating your Halloween nail designs at home can be quick, easy, and stylish.
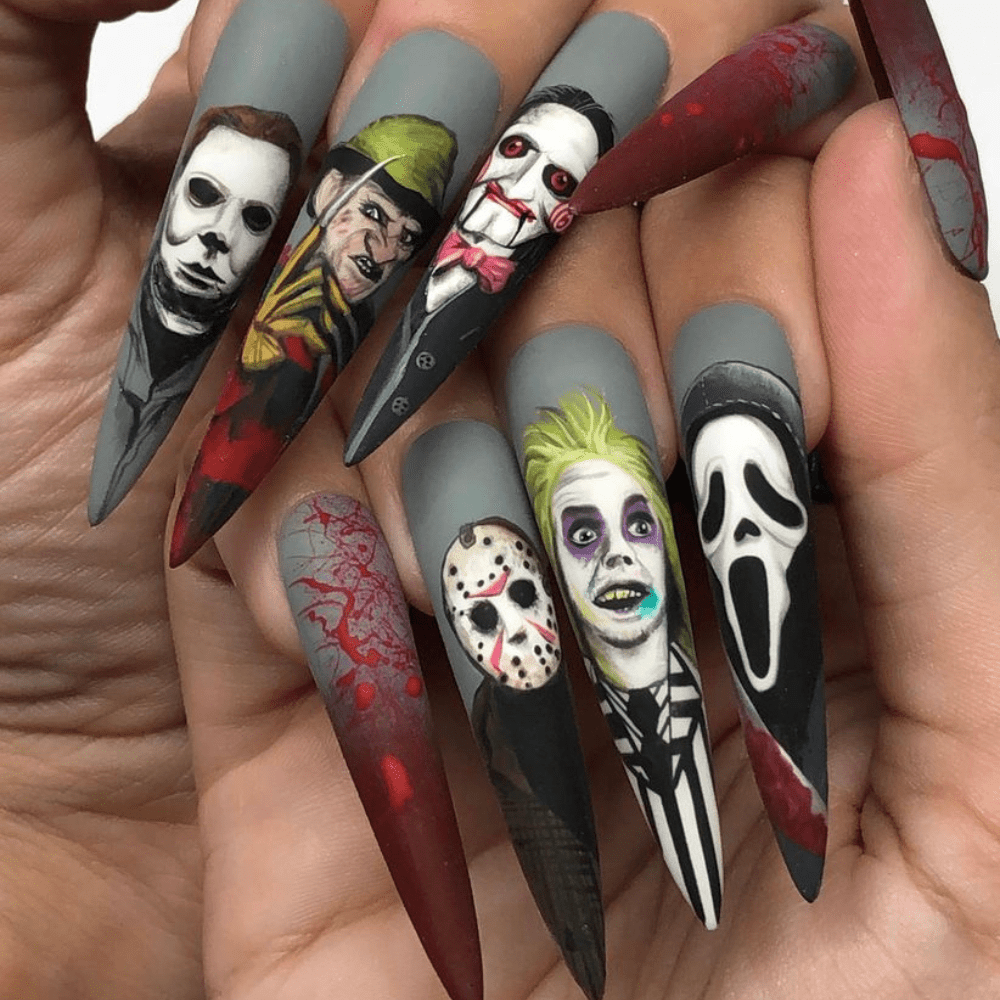
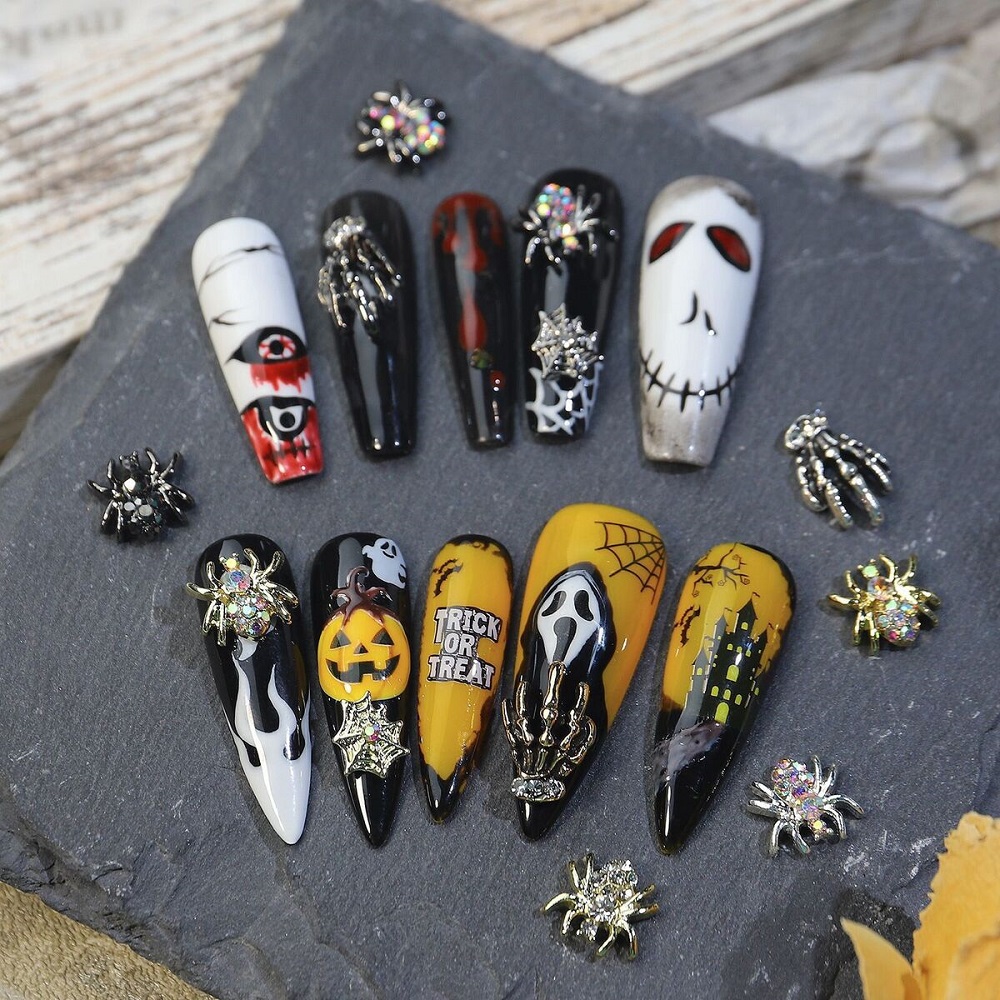
Spooky Inspirations: Nail Art with Halloween Icons
Turn your nails into mini Halloween masterpieces with iconic designs. These ideas highlight popular Halloween symbols to elevate your nail art game this spooky season.
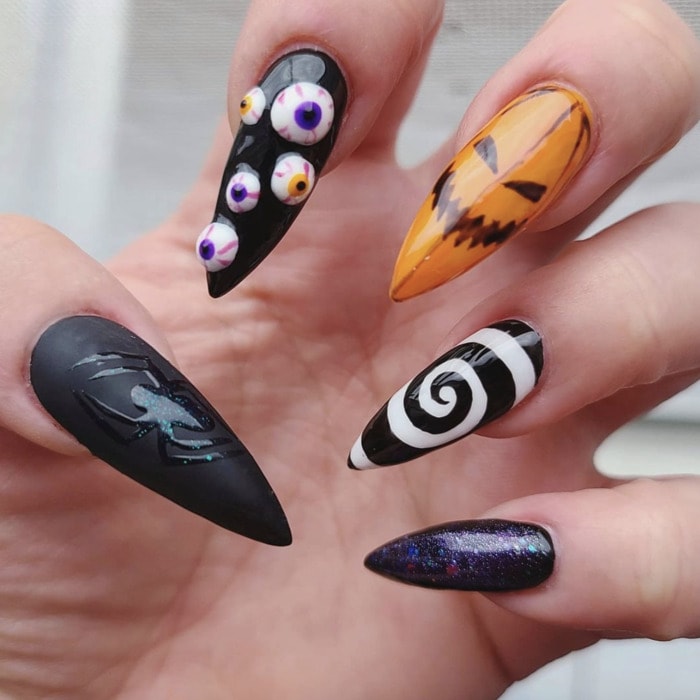
Pumpkins, Ghosts, and Skeletons
- Pumpkins: Add classic orange pumpkins with green stems for a festive touch. Try minimalist versions for a modern look.
- Ghosts: Create cute or spooky ghost designs using white polish on a black or nude base.
- Skeletons: Paint tiny skeletons or skulls with black and white polish. For a fun effect, add glow-in-the-dark details.
Black Cats and Bats
- Black Cats: Use fine brushes to draw black cats with glowing eyes. Match with a dark base.
- Bats: Add bats flying across your nails using black polish. Pair with a silver or deep blue sky.
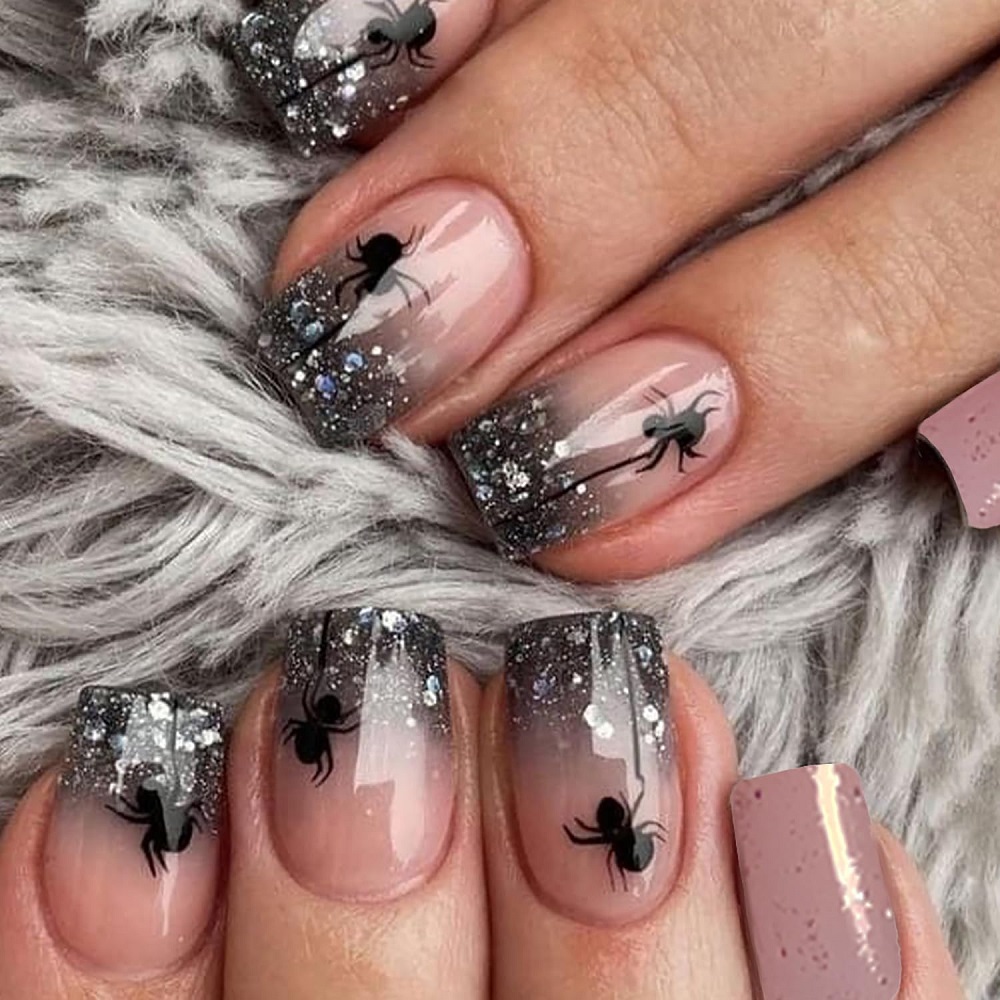
Haunted House and Spider Web Designs
- Haunted Houses: Paint spooky haunted houses with crescent moons or glowing windows on your nails. Start with a dark gradient background.
- Spider Webs: Use white or silver polish to design intricate webs on black or red bases. Complete the look with small 3D spiders or cobweb accents for texture.
These nail inspirations let you embrace Halloween creativity in style. Mix and match icons to design your perfect spooky look!
Elegant and Subtle Halloween Nail Designs
Not all Halloween nails need to be loud and dramatic. Some prefer understated elegance that still captures the spooky essence of the season. Elegant and subtle designs offer the perfect balance of sophistication and festivity.
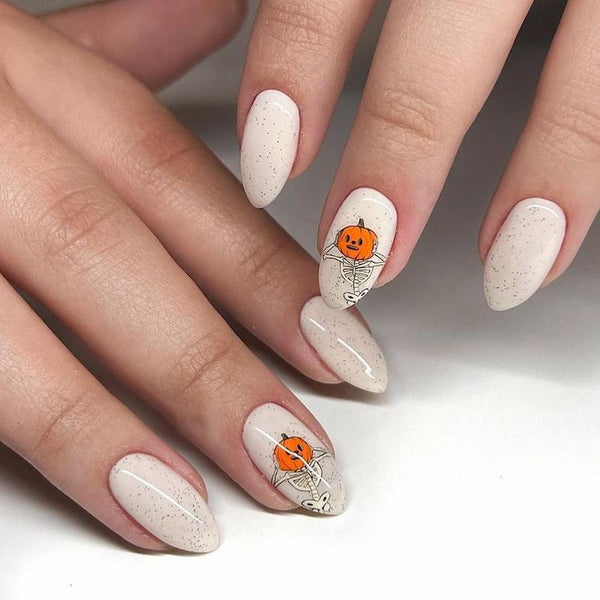
Minimalist Halloween Looks
Minimalist nail designs are perfect for those who favor clean and simple styles. Here are a few popular ideas:
- Tiny Halloween Symbols: Add small pumpkins, ghosts, or spider webs on a neutral or pastel base.
- Negative Space Designs: Use clear polish with fine black lines to create minimalist Halloween patterns.
- Single Accent Nail: Paint one nail with a spooky design while keeping the others in a solid shade.
- Slim French Tips: Replace classic white tips with black or orange for a Halloween twist.
These designs are easy to create and look effortlessly chic.
Sophisticated Dark Color Schemes
Dark tones can give your nails a refined Halloween vibe without being overbearing. Try these sophisticated ideas:
- Matte Black Nails: Add a modern touch with matte black polish, paired with subtle glitter accents.
- Deep Burgundy or Plum: These shades evoke the richness of the season while remaining stylish and understated.
- Charcoal with Metallic Details: Use metallic nail art to draw minimal designs like stars, moons, or thin stripes.
- Subtle Gradient Effects: Blend dark shades like navy and black for an ombre effect that feels mysterious yet elegant.
With these dark hues, your nails will exude both Halloween spirit and refinement.
Elegant Halloween nail designs prove that less can indeed be more. Opt for these subtle styles for an effortlessly classy Halloween look.
Glow-in-the-Dark Halloween Nail Trends
Glow-in-the-dark nail designs are perfect for spooky Halloween vibes. These styles add a fun and eerie twist to your look. Whether at a party or trick-or-treating, glowing nails will surely stand out.
How to Achieve the Glow Effect
Creating glowing nails is easier than you think. Follow these simple steps to get the perfect glow:
- Choose Glow-in-the-Dark Polishes: Look for specialized nail polishes with phosphorescent pigments.
- Prepare Your Nails: Clean, shape, and apply a base coat to ensure the polish sticks well.
- Apply a Base Color: Use a light or neon base color, as these enhance the glow effect.
- Add Glow Polish Layers: Brush on two to three coats of glow polish. Let each coat dry completely.
- Charge the Glow: Place your nails under a light source, like a UV lamp or bright light.
- Seal with a Top Coat: Protect your nails and make the glow last longer by sealing the design.
For added creativity, mix glow polish with spooky nail art. Spider webs, bats, and ghosts look amazing when they glow.
Best Nail Polishes for Glow Designs
The right nail polish ensures the best glow effect. Here are some top choices for Halloween:
- Fluorescent Nail Paints: These provide a bright, long-lasting glow. Try them with neon or pastel shades.
- UV-Activated Polishes: These glow vibrantly under blacklight, giving a theatrical effect.
- Glow-in-the-Dark Glitter: Add sparkle and shine to your design without compromising the glow.
- Top Coats with Glow Properties: Transform regular nail designs into glowing beauties with specialized top coats.
Remember to test polishes to check their brightness before applying. High-quality glow polishes make your Halloween nails unforgettable.
Glow-in-the-dark Halloween nail designs add excitement to your spooky style. Experiment with different patterns and colors for a truly magical effect!
Tips for Long-Lasting Halloween Nails
Creating stunning Halloween nail designs is rewarding, but ensuring their durability is equally important. Proper care and the right products are key to maintaining your spooky creations.
Prep and Caring for Nail Art
- Start with Clean Nails: Remove old polish and wash nails thoroughly before applying a new design.
- Use a Base Coat: This protects your nails and allows colors to adhere better.
- Avoid Thick Layers: Apply nail polish in thin coats to prevent chipping and cracking.
- Seal with a Top Coat: A good top coat locks in the design and adds shine.
- Keep Nails Moisturized: Use cuticle oil daily to prevent dryness and peeling.
- Gentle Cleaning: Avoid harsh chemicals or activities that can damage your nail art.
- Protect Your Designs: Wear gloves during chores to prevent scratches and chips.
Following these steps ensures your Halloween nails stay flawless for longer.
Top Products for Durability
- High-Quality Base Coat: Invest in a premium base coat for added protection.
- Long-Lasting Top Coat: Opt for a top coat with anti-chipping features.
- Fast-Drying Nail Polish: Quick-dry polishes reduce smudging and improve longevity.
- Cuticle Oil: Hydrate your nails to keep designs intact.
- Nail Strengtheners: Strengthening products prevent breaking and enhance resilience.
- Non-Acetone Polish Remover: Gentle removers preserve nail health while cleaning edges.
The right tools and care steps will keep your Halloween nail designs durable and stunning throughout the season.
Unique Halloween Nail Ideas for Different Nail Shapes
Halloween nail designs can be tailored to every nail shape. From bold coffin styles to elegant almond tips, customizing designs enhances their appeal. Let’s explore trendy ideas for various nail shapes.
Coffin, Stiletto, and Almond Designs
- Coffin Nails: Coffin nails are perfect for bold and dramatic designs.
- Add spider webs or haunted house patterns for a spooky vibe.
- Gradient ombre shades with bats flying across create a stunning effect.
- Use 3D elements like rhinestones to enhance a gothic style.
- Stiletto Nails: Stiletto nails are edgy and fierce, perfect for Halloween.
- Paint fiery flames or dripping blood designs for scary vibes.
- Glow-in-the-dark ghosts or skeletons add a fun twist.
- Metallic accents enhance their sharp and sleek look.
- Almond Nails: Almond shapes offer elegance while embracing Halloween themes.
- Try deep plum or black matte finishes paired with subtle gold details.
- Create crescent moons, stars, or mystical symbols with delicate lines.
- Chic pumpkin or spider web designs work wonderfully on this shape.
Customizing Art for Short and Long Nails
- Short Nails: Short nails can still be festive with clever designs.
- Minimalist art like single spiders or tiny ghosts works well.
- Use tiny glittery stars or negative space designs to add creativity.
- Try vertical stripes and slim designs to elongate the appearance.
- Long Nails: Long nails give more room for intricate and detailed art.
- Paint full scenes like eerie graveyards or flying witches.
- Combine ombre gradients with sparkling rhinestones for a dramatic look.
- Add layered effects, like 3D pumpkins or textured spider webs, for impact.
Customizing Halloween nail designs to suit your nail shape ensures a unique and captivating look. Whether bold or subtle, there’s a perfect idea for everyone!
Showcasing Your Halloween Nail Art
Final Touches Before Halloween
Once you’ve completed your Halloween nail designs, it’s time to show them off! Allow your nails to dry fully before engaging in any activities. This drying time ensures that your hard work doesn’t smudge or ruin your designs.
Consider taking photos of your final looks to share on social media or with friends. Engaging with a community of enthusiasts can inspire further creativity and provide opportunities for feedback.
Planning for Halloween Events
As Halloween approaches, think about your plans for showcasing your nail art. Whether you attend a costume party, a haunted house, or simply enjoy trick-or-treating, make sure your nails match your overall theme.
Your nails can be the perfect finishing touch to your costume, enhancing the festive vibe. Plan ahead to ensure your nail designs are fresh and ready to impress for any Halloween event you participate in. Embrace the creativity of the season and let your nails become a fun conversation starter.
Embracing Creativity with Halloween Nail Designs
In conclusion, Halloween nail designs offer an exciting way to express creativity and celebrate the holiday spirit. With countless themes, colors, and styles to explore, everyone can find a design that resonates with them. From spooky ghosts to glamorous witch-themed nails, these designs allow for individuality and artistic expression.
By gathering the right tools, preparing your nails carefully, and embracing a little creativity, you can achieve stunning nail art that complements your Halloween celebrations. Whether you opt for playful designs or more elaborate styles, allowing yourself to experiment will make the experience enjoyable.
This Halloween, let your nails reflect your personality and creativity. Get inspired, get artistic, and have fun showcasing your Halloween nail designs. After all, it’s all about expressing yourself and enjoying the festive vibes that come along with this spooky season.